# CKEditor 텍스트 에디터

# 🧱Preference
Windows10
python 3.7 이상
Git Bash
Django 기본 구조
# ✍ 이전 blog 프로젝트
CKEditor를 활용하고 쉽게 적용하기 위해 리마인드 & 프로젝트 설정을 위한 Blog App의 구성(form, static 경로 설정 등)이 필요합니다.
읽어보시고 기존 프로젝트에 적용해보셔도 좋습니다!
# Directory 구조
blog_ckeditor
├── blog_ckeditor
│   ├── templates
│   │   └── base.html
│   ├── __init__.py
│   ├── settings.py
│   ├── urls.py
│   └── views.py
├── blogapp
│   ├── templates
│   │   └── blogMain.html
│   │   └── createBlog.html
│   │   └── index.html
│   ├── static/css
│   │   └── cover.css
│   │   └── navbar-top-fixed.css
│   ├── __init__.py
│   ├── admin.py
│   ├── apps.py
│   ├── migrations
│   │   └── __init__.py
│   ├── models.py
│   ├── tests.py
│   ├── urls.py
│   ├── forms.py
│   └── views.py
├── db.sqlite3
├── manage.py
└── static
    ├── admin
    │   └── css
    │   └── fonts
    │   └── img
    │   └── js
    ├── css
    │   └── cover.css
    └── └── navbar-top-fixed.css
# 1. CKEditor
이번 Session에서는 관리자 기능을 좀 더 잘 활용할 수 있는 기능을 추가해보려고 합니다.
기존에 Text Area의 Body 에 글자를 예쁘게 꾸밀 수 있는 텍스트 편집기를 추가할 수 있는 CKEditor를 알아봅시다.
CKEditor는 WYSIWYG 방식의 텍스트 편집기입니다.
# ⏹WYSIWYG?
위지위그라고 읽으며 What You See Is What You Get 의 줄임말로서 '보는대로 얻는다' 라는 의미입니다.
블로그나 웹 페이지에서 글을 쓸 때, 눈에 보이는 글씨의 모양 그대로 문서 편집을 할 수 있는 것을 말합니다.
참고) CKEditor란?
CKEditor는 대부분의 브라우저에서 지원합니다.
이 툴을 이용하면 간단하게 문서 편집 기능을 사용자에게 제공할 수 있습니다.

기존의 밋밋한 Admin Text Area
# 2. CKEditor Tool 설치 및 등록
터미널에 설치 명령어를 입력합니다.
$ pip install django-ckeditor
[projectFolder]-[settings.py]
INSTALLED_APPS = [
    'django.contrib.admin',
    'django.contrib.auth',
    'django.contrib.contenttypes',
    'django.contrib.sessions',
    'django.contrib.messages',
    'django.contrib.staticfiles',
    'blogapp.apps.BlogappConfig',
    'ckeditor', # Add
]
# ⏹models.py 적용
from django.db import models
from ckeditor.fields import RichTextField

class Blog(models.Model):
    title = models.CharField(max_length=100)
    pub_date = models.DateTimeField()
    # body = models.TextField()
    body = RichTextField()
# ⏹migration
$ python manage.py makemigrations
$ python manage.py migrate
# 3. Static files
이전 Session에서 적용했던 Static file에 관한 Setting이 선행되어야 CKEditor를 사용할 수 있습니다!
리마인드하며 다시 static file만 적용시켜봅시다.
이전 포스팅을 그대로 따라오셨다면 생략하셔도 좋아요!
# ⏹setting.py - Static 파일 경로 알려주기
settings.py에 가서 아래 코드를 추가해주세요.
import os

# ... 생략

STATICFILES_DIRS = [
    os.path.join(BASE_DIR, 'blogapp', 'static')
]

STATIC_ROOT = os.path.join(BASE_DIR, 'static')
# 4. collectstatic 관리 실행
$ python manage.py collectstatic
static file에 대한 경로를 정확히 명시해주고 위 명령어를 실행하면 Django는 생성된 프로젝트 폴더에 static 폴더를 자동으로 생성해줍니다.
# 5. Admin Page에서 확인
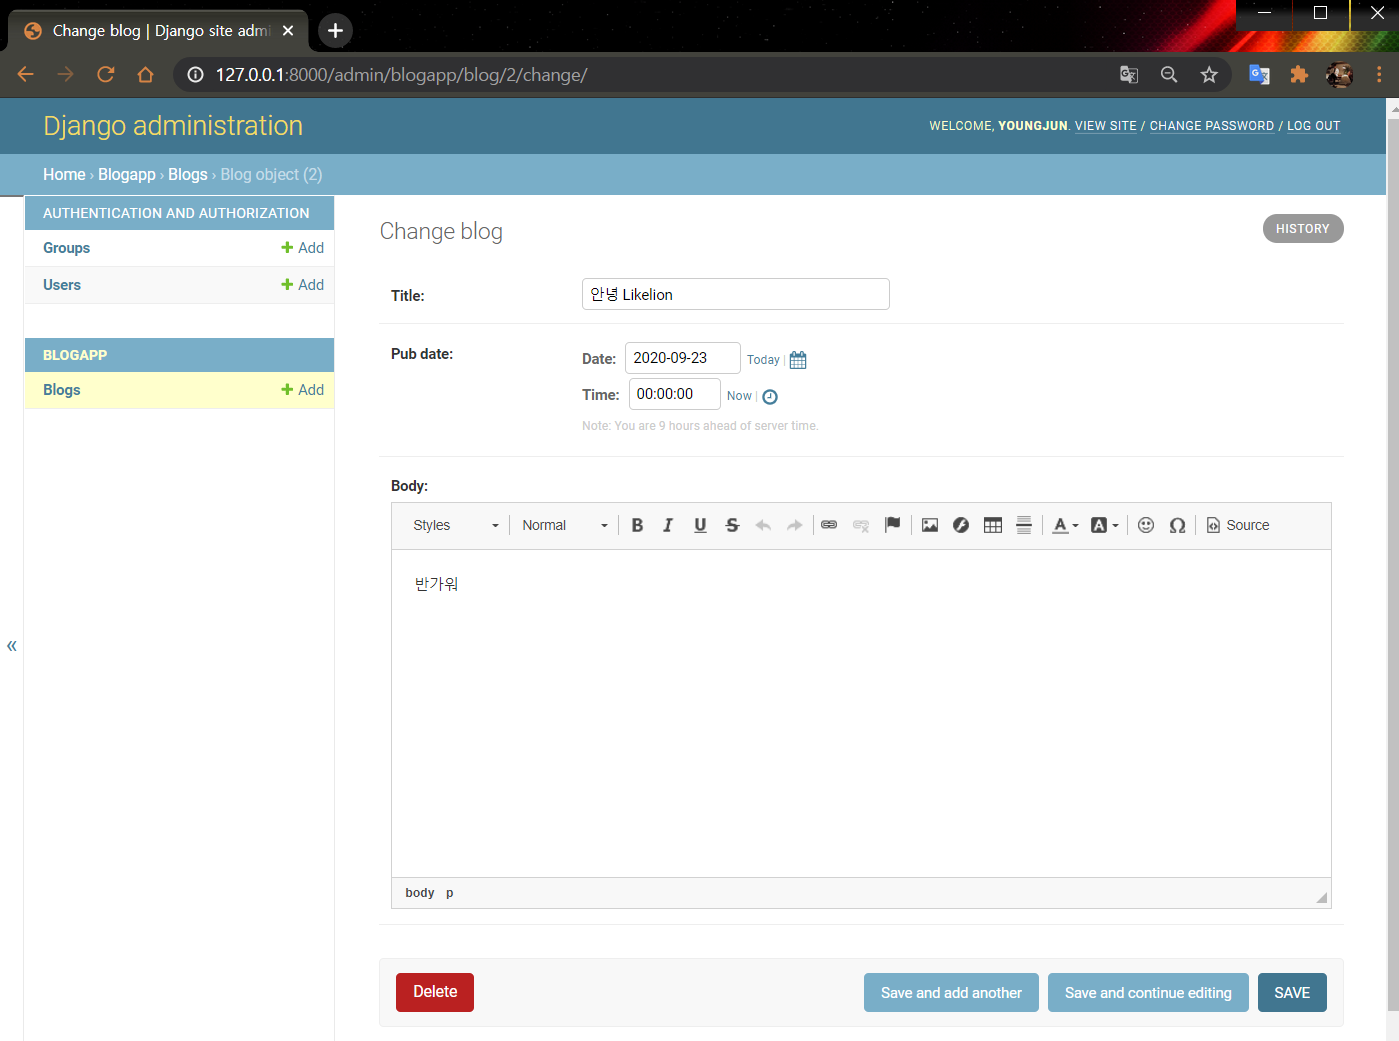
이제 Text Area를 CKEditor의 Text Field로 바꿔봅시다.
/blog/models.py/
from django.db import models
from ckeditor.fields import RichTextField # Add

class Post(models.Model):
    title = models.CharField(max_length=200)
    pub_date = models.DateTimeField('date published')
    # body = models.TextField()
    body = RichTextField() # Add

    def __str__(self):
        return self.title
예쁘게 텍스트를 편집할 수 있는 에디터가 보이면 성공입니다.
# Reference
- https://github.com/django-ckeditor/django-ckeditor
- https://jamanbbo.tistory.com/43
- https://opentutorials.org/module/4034/24908